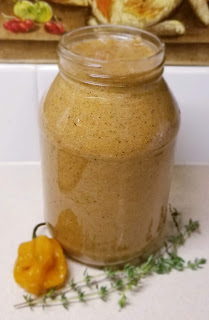
HOW TO MAKE A FLOUR SOURDOUGH STARTER
I love the smell of fresh bread baking. There is nothing quite like the smell in your home. Oh, but when you get the loaf out of the oven and it has cooled enough to cut a slice...Oh snap!!! I am truly in heaven then. Slather on some butter and it is to die for yumminess. BUT you add the fact that your bread is sourdough goodness you just upped that anty.
With that in mind, you too might be interested in making your own so you can have the awesome aroma in your home. You will love me or you just might hate me for it.
A sourdough starter takes 2 ingredients but it includes a bit of patience, some time, and a whole lot of love. It takes time so you MUST be patient while it does its magic.
Another thing you need to keep in mind is the type of sourdough you wish to make on a regular basis because this will depend on the flour you will use when making your starter. I mean let us get real peeps you do not want to use a pumpernickel flour if you do not want to make pumpernickel every week. This is why I chose an unbleached plain flour. When making bread you can always add another flour so it is easier to start with unbleached flour. You do NOT need to use flour or water with chemicals because you are wanting the natural yeast in the air to combine with your starter to give it its magical powers. So from this point on when I refer to water and flour know that the water is either distilled or spring and the flour is unbleached plain flour.
UPDATE: I since have started this again and have found if you use for your first-day unbleached wheat flour and equal amount chlorine-free water, you will get a better starter. After day one you can use unbleached flour or unbleached bread flour.
DAY ONE
4 ounces of flour (1 Cup normally) and 1 cup water (see the note/update above) combine in a non-reactive container, which is glass, crockery, stainless steel or food-grade plastic. Make sure you have stirred really well because you do not want lumps of flour sitting in your starter.
Cover your container loosely (I use a disposable shower cap. The cheaps ones you get 8 in a pack from the dollar store) and allow to sit in a warm place for 24 hours. You really want around 70 degrees because this helps your starter work quicker.
There are lots of places you can put your starter to ensure a warm environment but I normally use the oven with no temp but with the light on. Just do not forget you have it in there, NOT that I have ever in my life done that. HAHA
DAY TWO
Hopefully, you will see some bubbly going on by now. If not, do not fret because you are not done. Yes, that is a double negative. After all, I am from the South.
You will need to discard half of your starter and feed it again.
Again using the 1 to 1 ratio of flour to water. Yes, this is a bit different than before or even other blogs but it works.
If you do not want to waste the discard give it to a friend or make pancakes.
DAY THREE
You should def being seeing some bubbling which means your yeast is growing.
At this point, you will start feeding it twice daily. Discard everything but a half of a cup of your starter.
Sit aside loosely covered for 12 hours then repeat the process again.
DAY 4, 5
Repeat the same process for days 4 and 5 as you did on Day 3. You really should start seeing a lot of foaming and bubbling going on.
DAY 6
At this time you are really hoping that when you discard and feed you will see your starter double in size in 4 to 6 hours. You will also want that tangy smell that you only get from sourdough bread. Repeat the discard and feed one more time. Allow it to sit 4 to 8 hours. If it doubles in size again you are ready to start making bread. You will take out what you need for your recipe normally a cup and what is left is your starter. Place it in whatever container you will keep it in and put it in the fridge.
If you are not doubling during that time frame this is where a lot more patience must come in because you will need to continue the twice a day feedings until you get your starter doubling.
If the weather is cooler it could take up to 2 weeks for your starter to mature.
Now you understand why I mentioned time, patience, and love. You must have all of this to make a successful starter. It is not easy but it will be worth it.
Note: Some people will tell you to start with whole wheat flour but feed from that point on with unbleached plain flour. This is up to you.
ENJOY!!


Comments
Post a Comment